Goal: This week was about soldering a circuit board that could function, at least to some degree.
First Impressions
I had never soldered before, though I had seen it a few times on YouTube. The concept seemed straightforward: heat the soldering iron, melt the solder (lead-based or otherwise), let it cool, and it bonds the components together.
In reality, the process was much trickier and more nuanced. After an hour-long demonstration by Anthony, we were given our own boards and components to try.
Reading Schematics
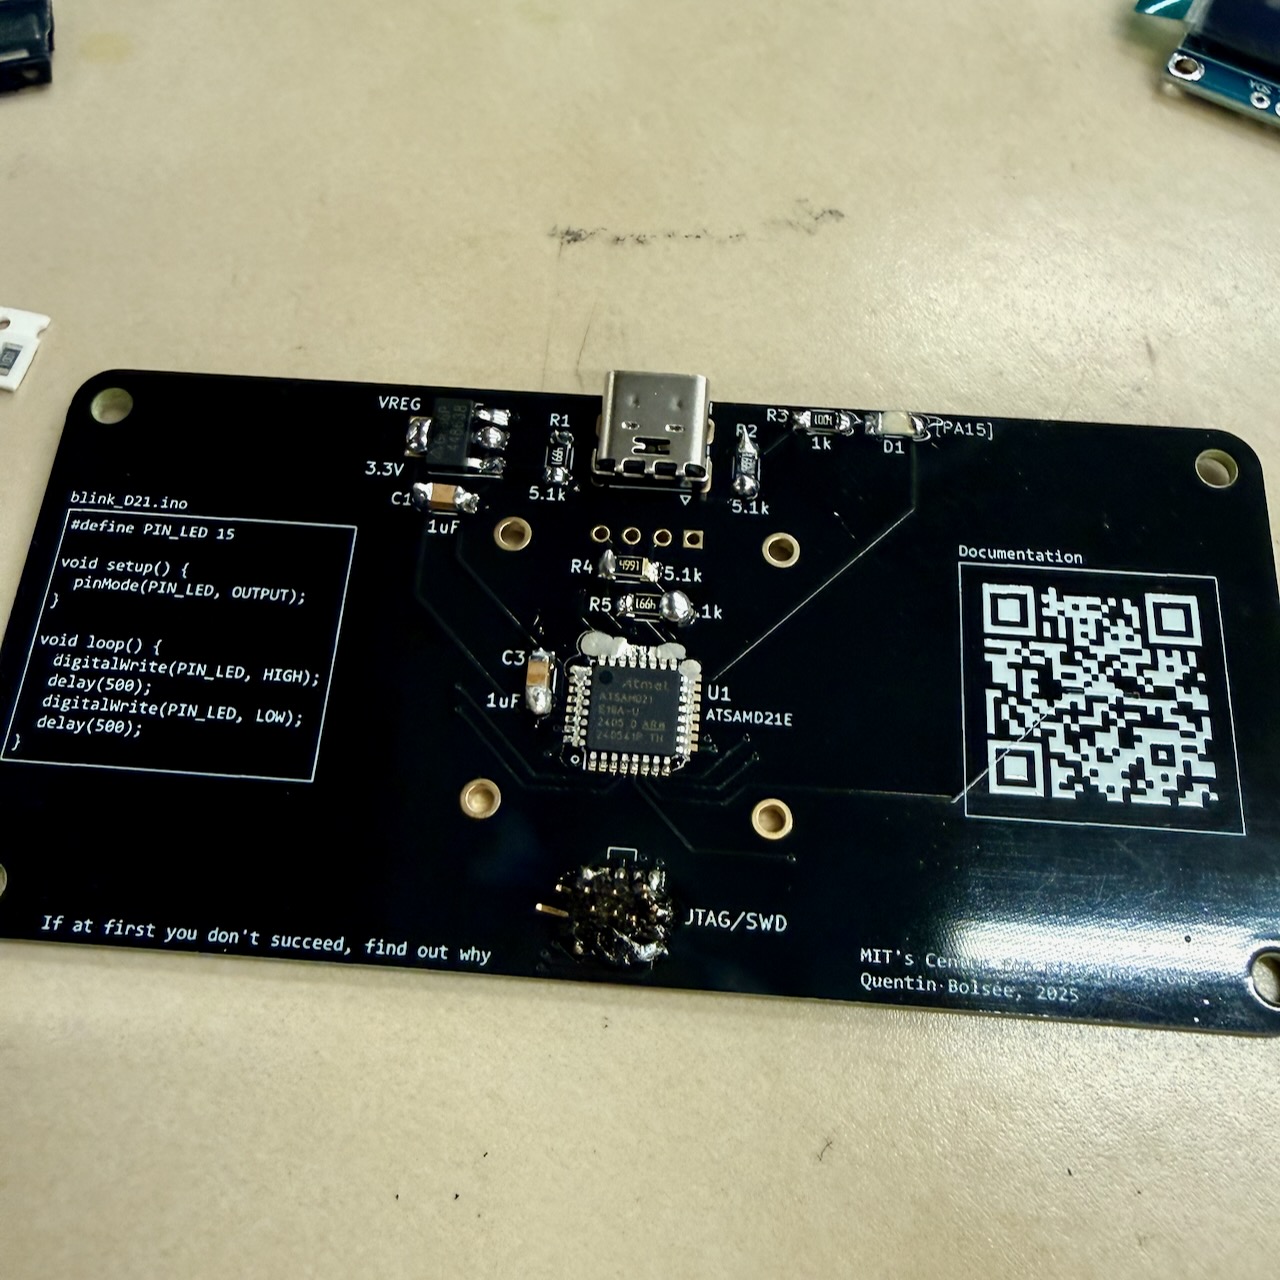
The first challenge was figuring out which piece went where. For that, we relied on the datasheet for the specific board we were using. The schematics show which port connects to which and does what.
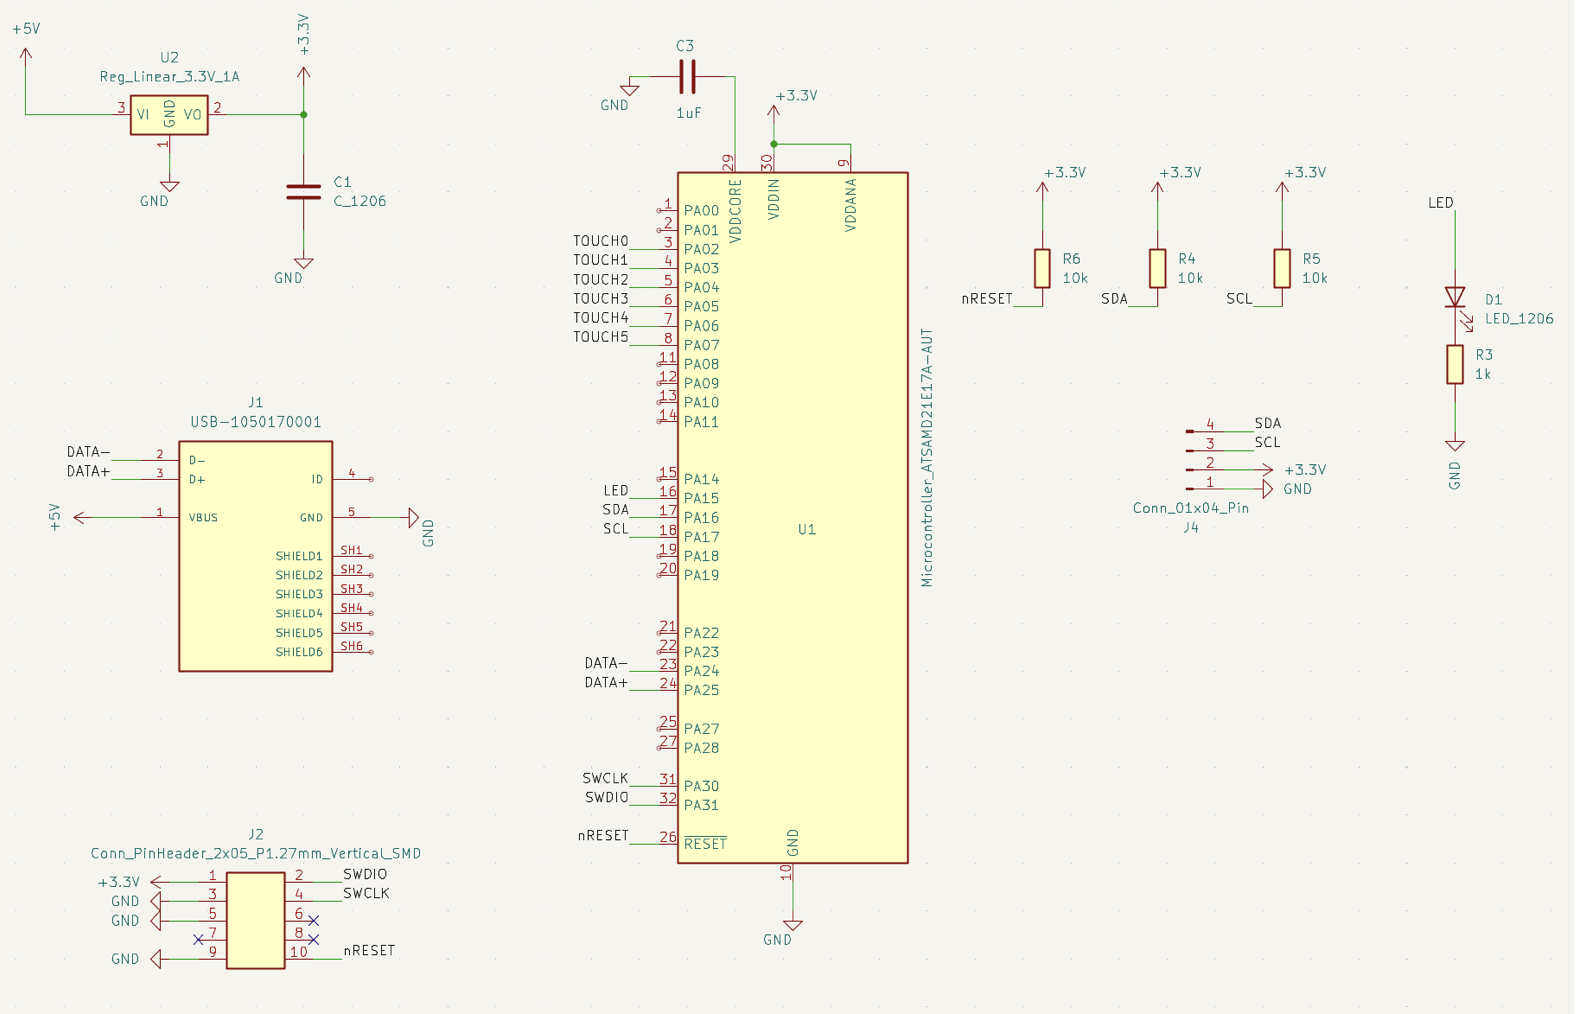
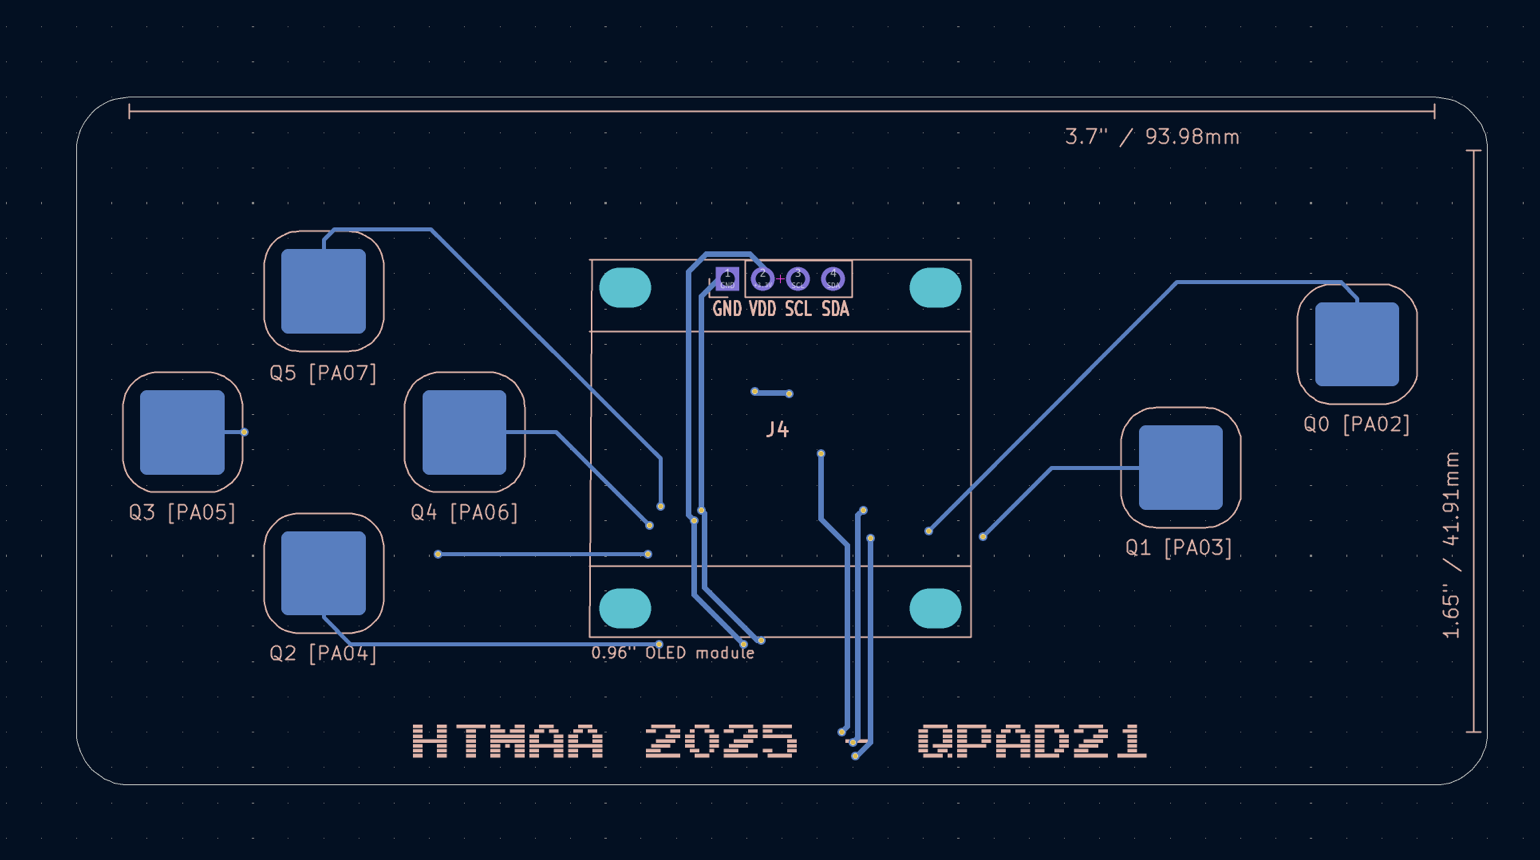
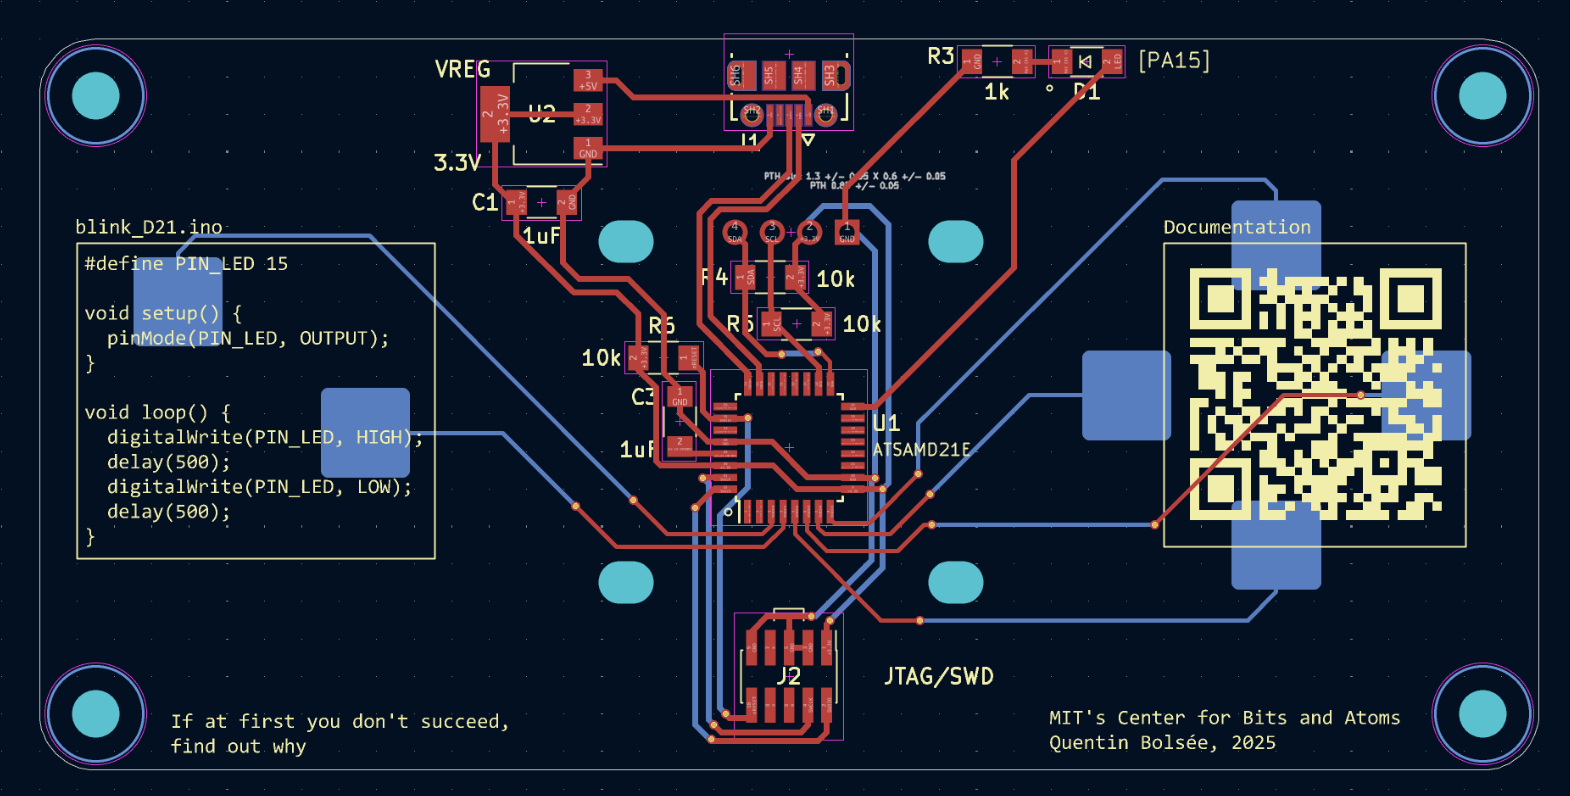
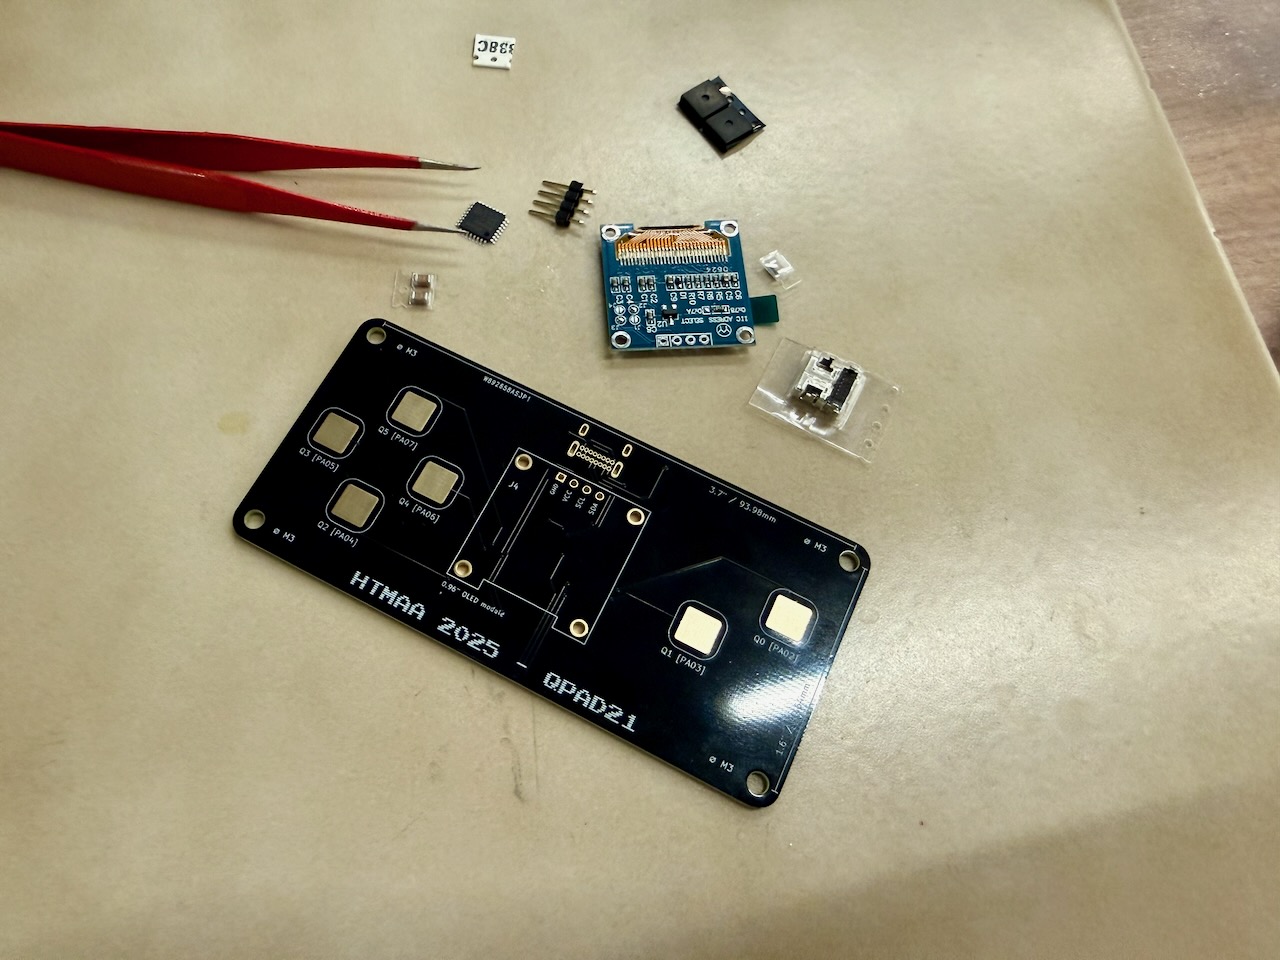
The actual board itself has info printed for reference too, though with some flexibility. For example, the board specified 5.1k resistors, but I was told 4.9k would work fine. Even though this stage only took about five minutes, it was surprisingly overwhelming. With so many tiny components scattered on the table, people scrambling for parts, and my limited knowledge of what each piece actually did, I felt out of my depth.
The Soldering Challenge
Unfortunately, I have never had especially steady hands, and soldering components barely a tenth the size of my fingernail only made that more obvious. Watching Anthony handle it effortlessly was both impressive and frustrating, especially as I kept nudging parts out of place with the tweezers.
One of the more fascinating parts of the process was using solder paste. It is oddly satisfying to see a glob of paste transform into neat solder points when exposed to hot air (about 280°C). My first attempt failed because I left the hot air gun on the default setting, and nothing happened after five minutes.
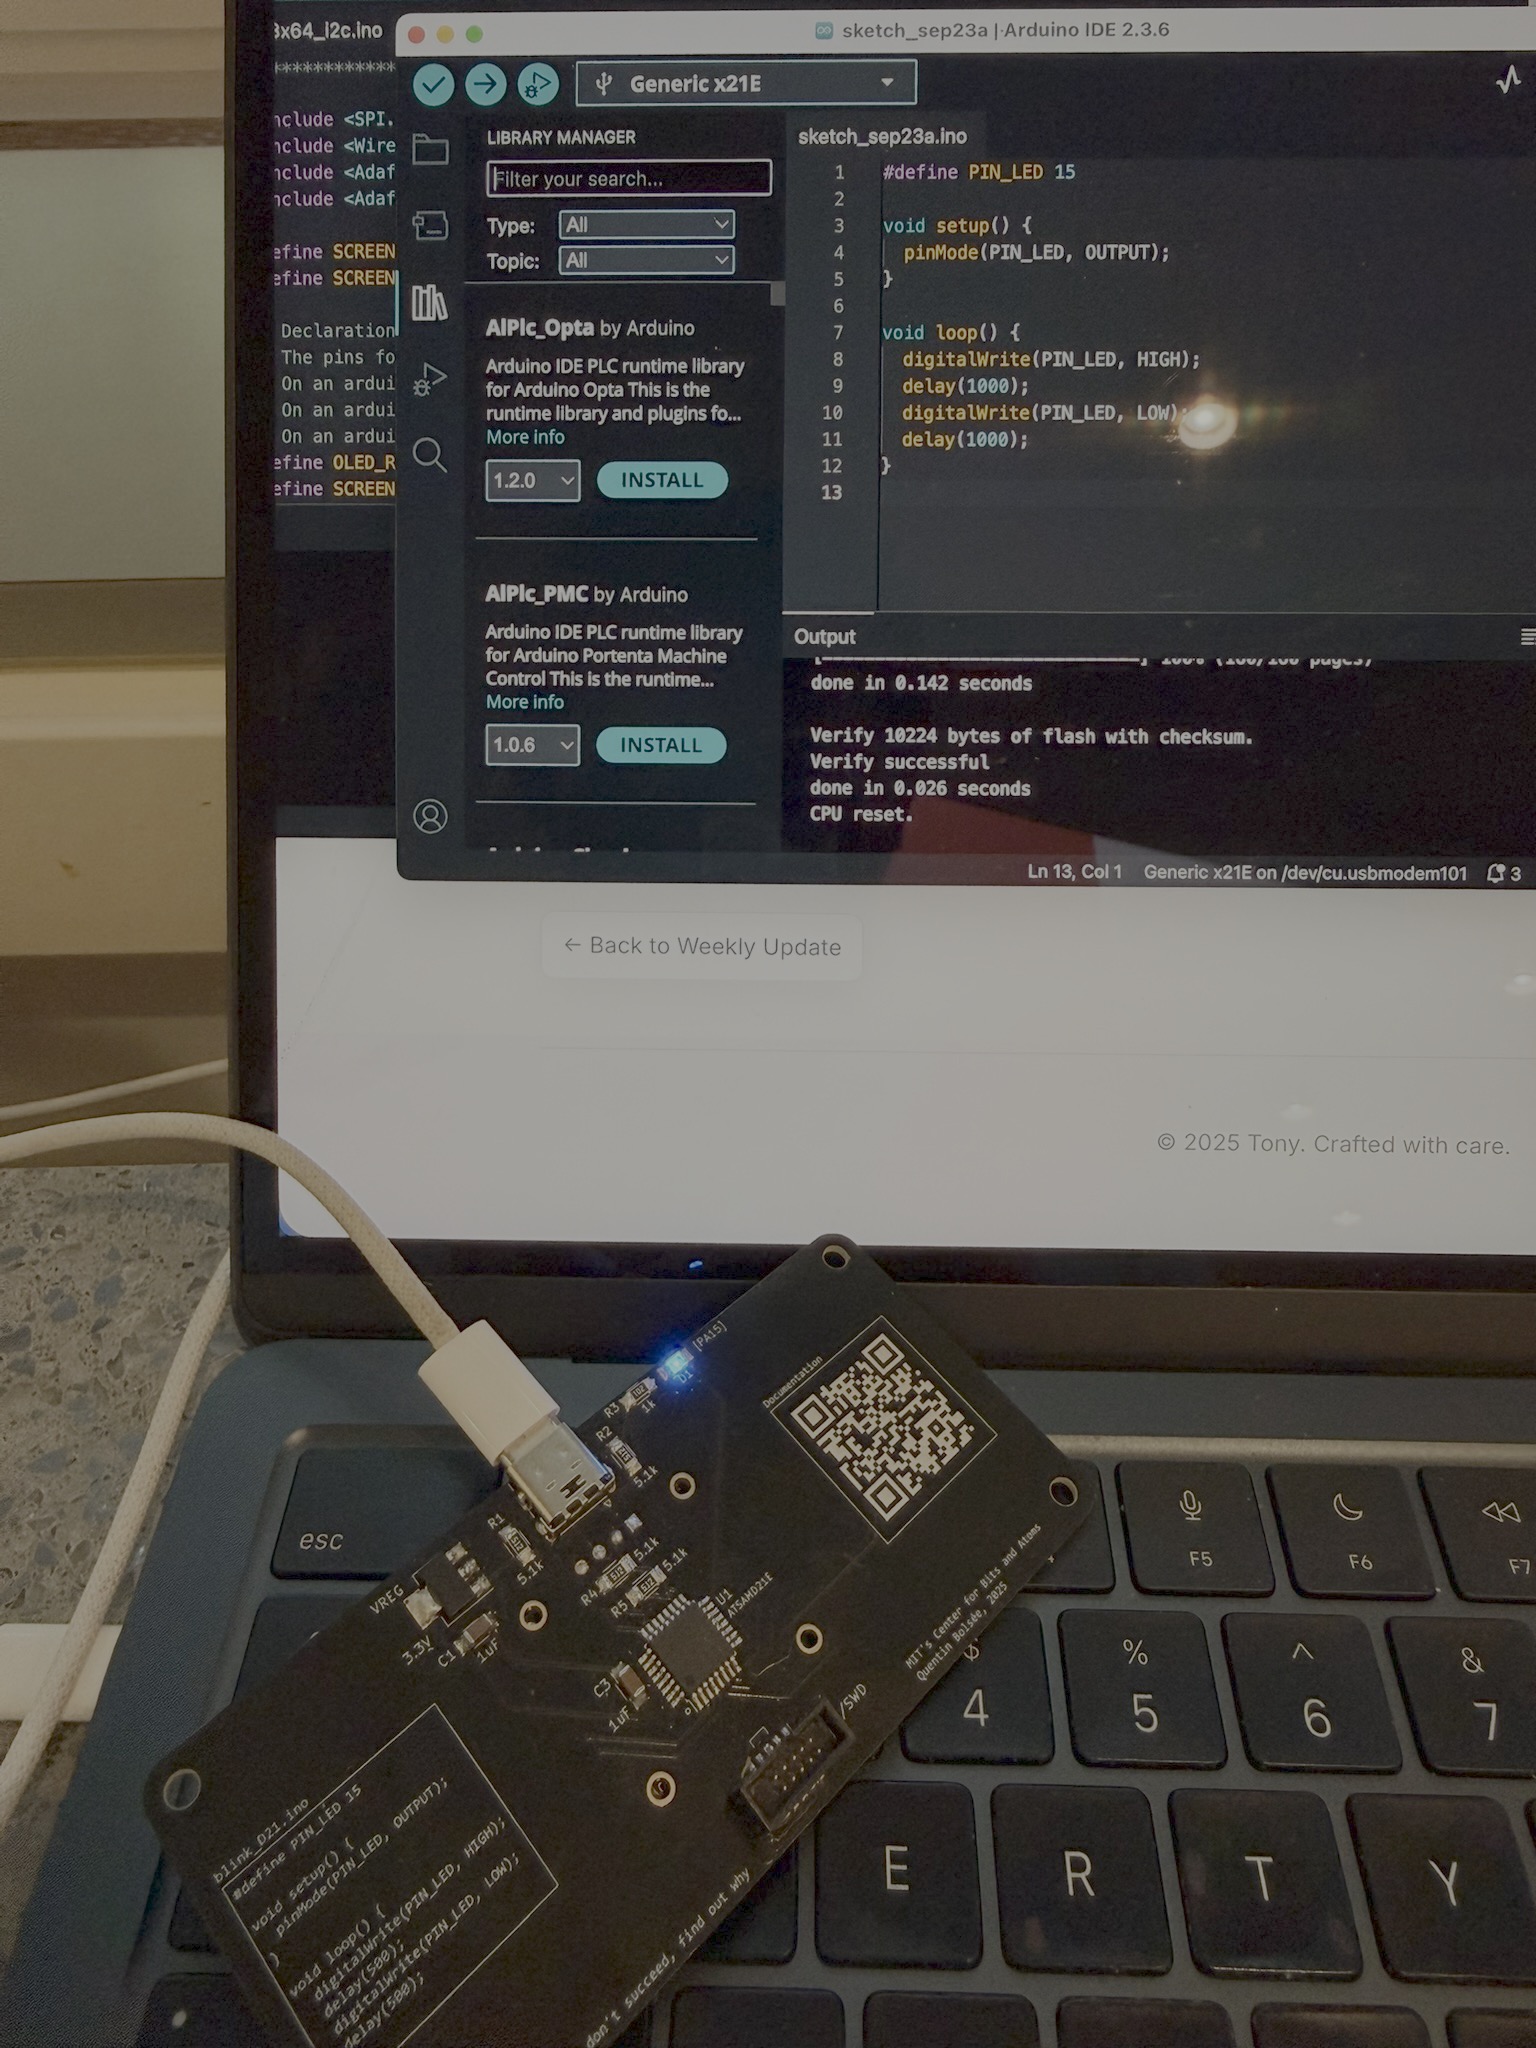
Programming and First Success
After preparing the board, we had to solder on a programmer and connect it in order to upload code. With some struggle both with Arduino settings and the soldering itself, I managed to burn the bootloader successfully. The result was that I could write the code and upload the sketch.
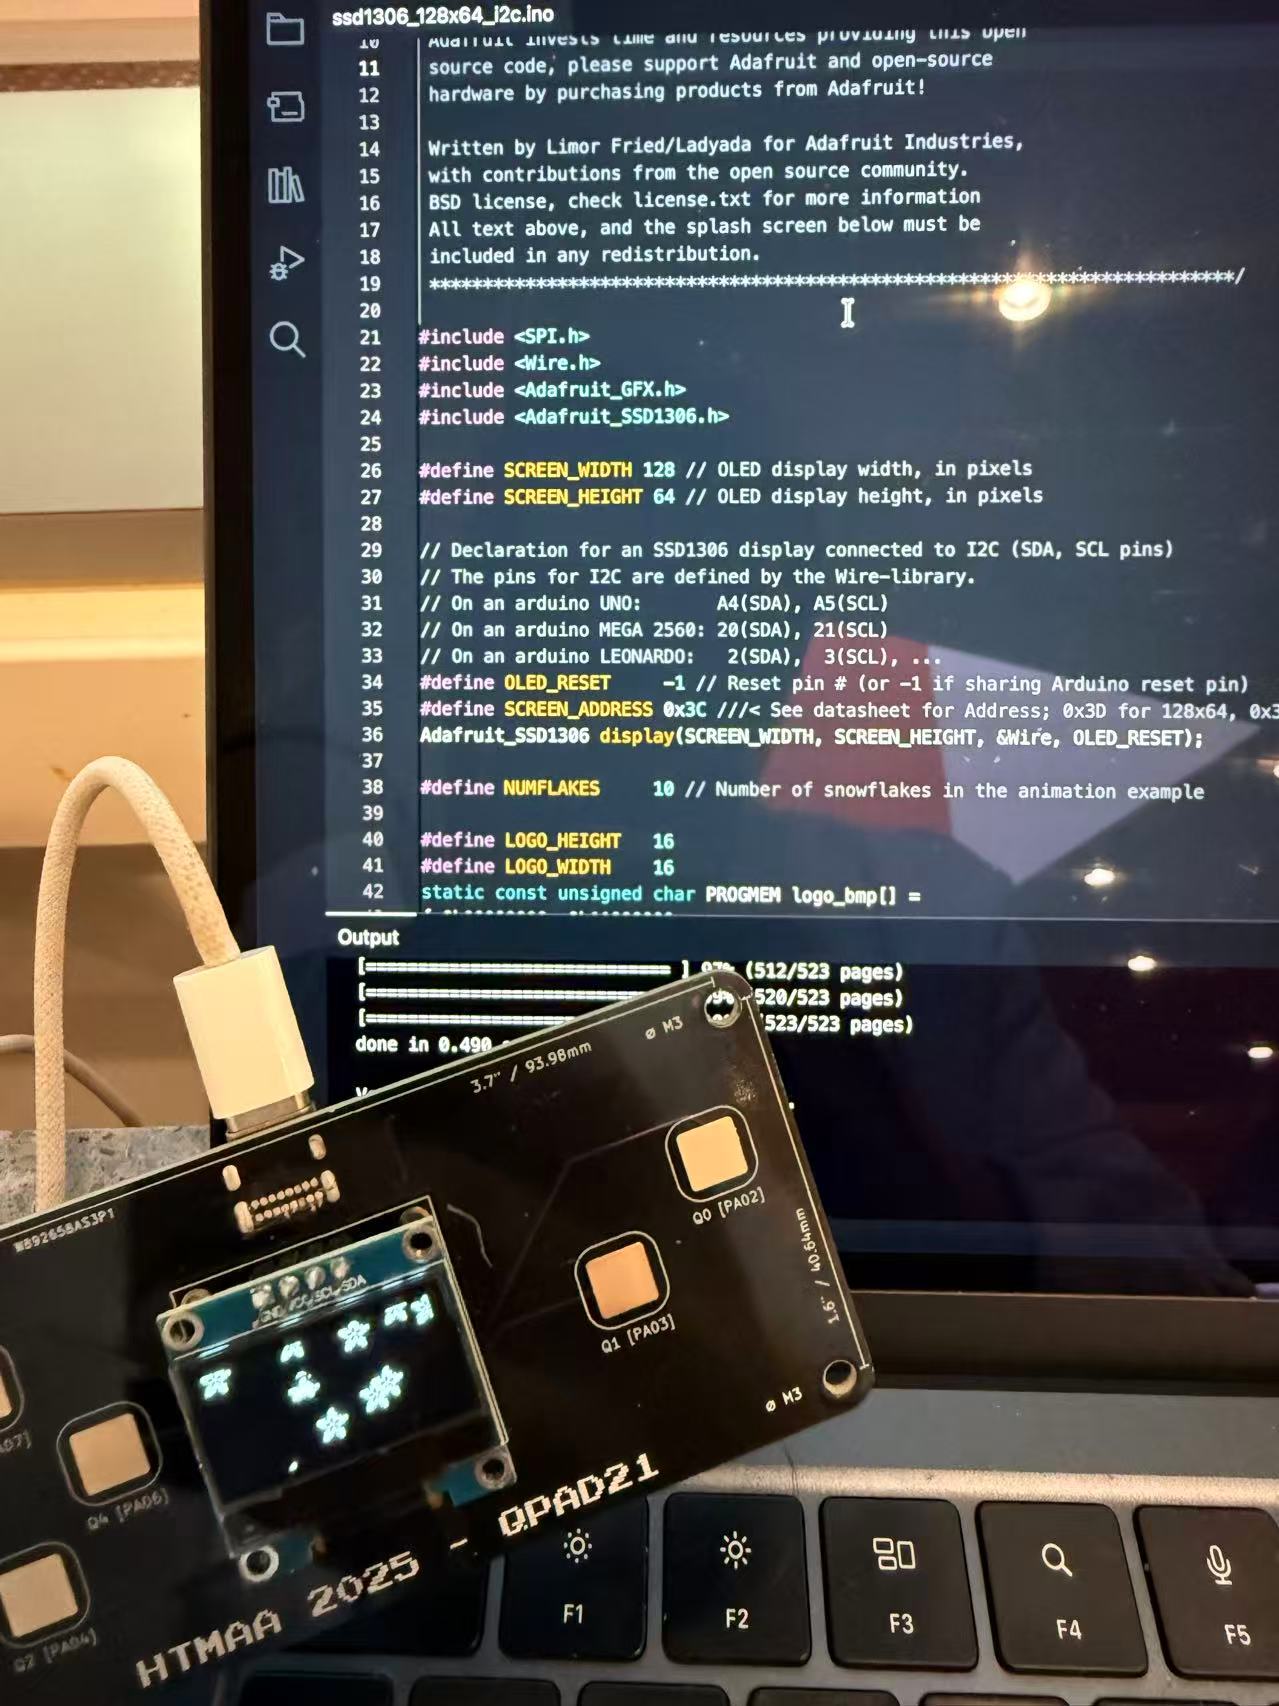
Chinese Character Support
However, when I tried to print out Chinese characters on the display, it did not work as expected. It showed scrambled signs beyond recognition. After some investigation, I realized that the font library I was using only supported English characters. To fix this, I had to find and integrate a new font library that included Chinese characters.
After some research, I used the U8g2 library available in the Arduino Library Manager, which supports Chinese characters.
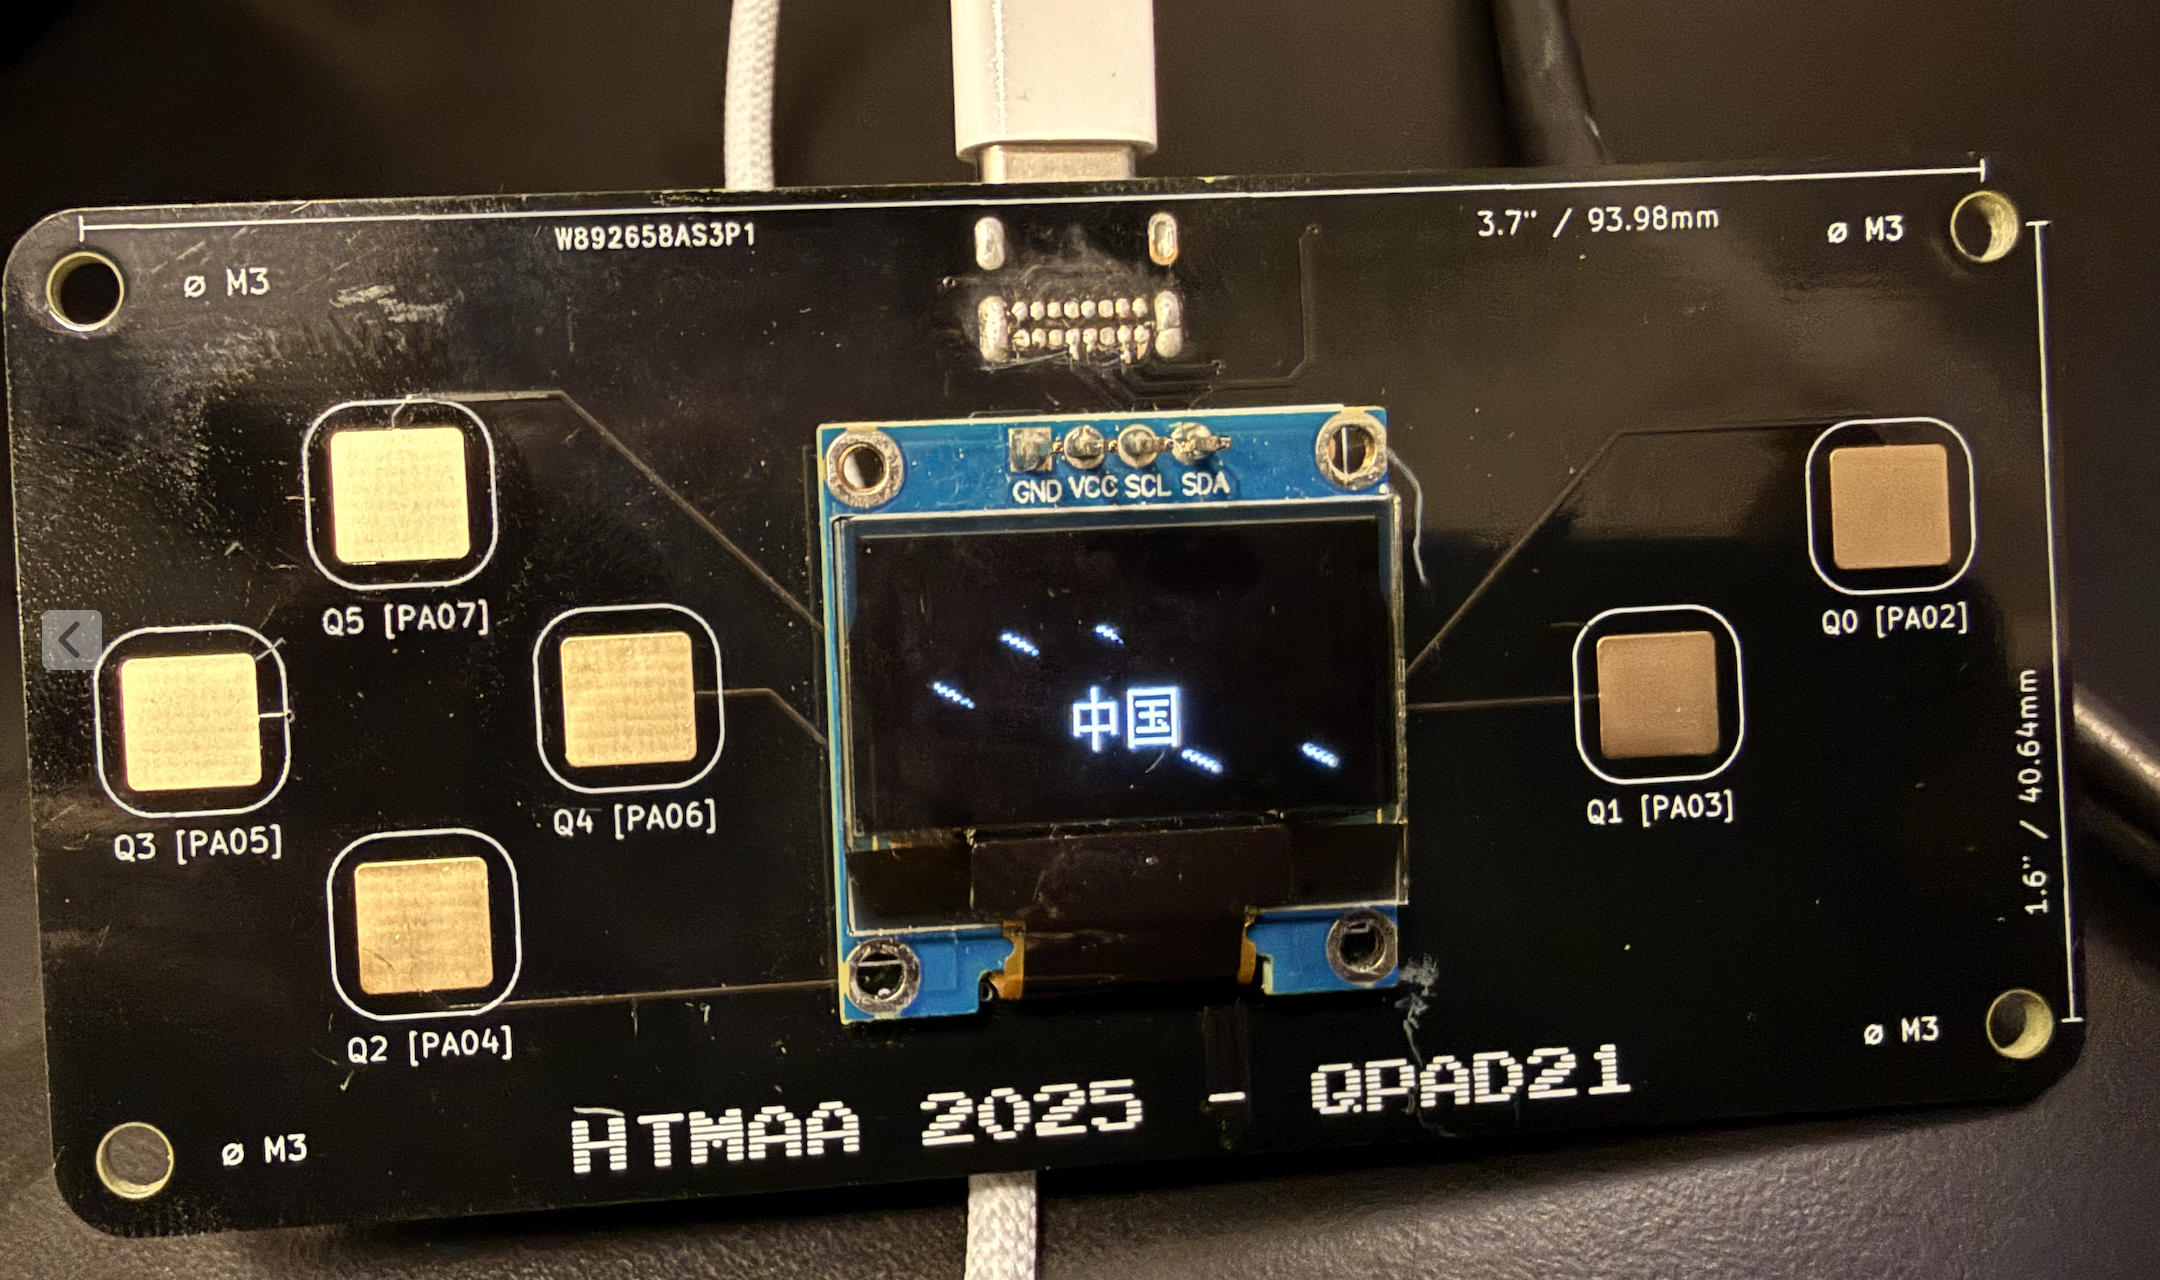
After updating the code and re-uploading it to the board, the display finally showed the Chinese text correctly with a background of meteor shower animation.
This experience taught me the importance of thoroughly checking library compatibility when working with different character sets in embedded programming.